Kindle App on Mac keeps crashing [fixed]
If your Kindle app on the Mac starts crashing on startup here’s how I fixed it.
1. Delete your Kindle App
2. In the terminal go to
username/Library/Containers
3. Remove
com.amazon.kindle
4. Reinstall the Mac Kindle app from amazon.com not from the app store.
Be aware: As com.amazon.kindle contains your local Kindle library and documents everything is gone after deleting it.
Gravit Designer Session
Gestern ein paar Stunden Gravit Designer ausprobiert. Um mal schnell ein paar Vektor Icons zu bauen, ist das ideal.


localhost https mit ssl auf dem Mac
Für Webprojekte ist https mittlerweile Standard.
Um möglichst nahe an der Produktionsumgebung zu sein, sollte die lokale Entwicklungsumgebung ebenfalls ssl verwenden.
Folgende Schritte sind unter Mac OS X notwendig.
Zertifikat erstellen
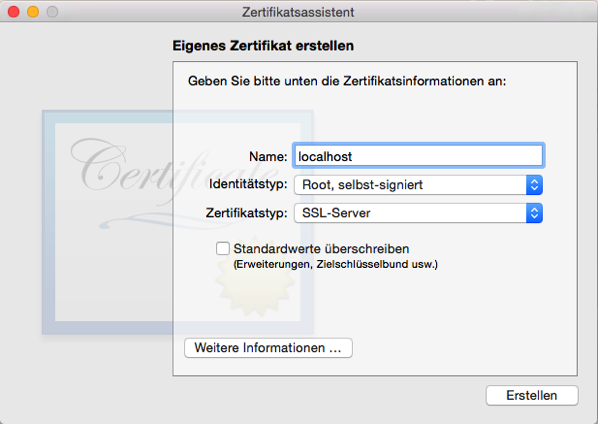
Die Schlüsselbundverwaltung öffnen. ‚Zertifikat erstellen…‘ auswählen.

Im Zertifikatsassistent die Felder ausfüllen.
Name: localhost
Identitätstyp: Root, selbst-signiert
Zertifikatstyp: SSL-Server
Auf ‚Erstellen‘ klicken.
Mac OS X gibt einen Hinweis auf die Unsicherheit solcher selbsterstellten Zertifikate.
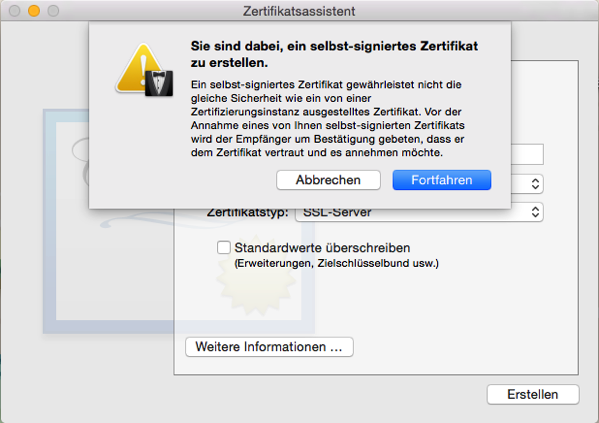
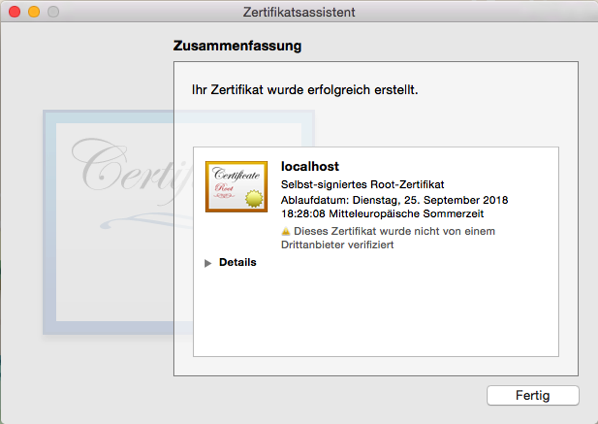
Auf ‚Fortfahren‘ klicken. Das neue Zertifikat wird angezeigt.
Zertifikat vertrauen
Dem erstellten Zertifikat muss nun noch vertraut werden.
Zertifikat in der Schlüsselbundverwaltung suchen und mit Doppelklick öffnen.
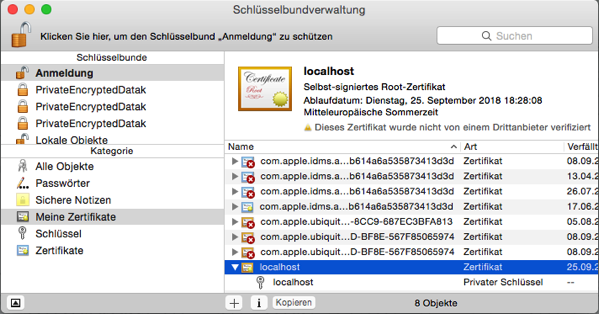
In den Zertifikatsinformationen den Abschnitt ‚Vertrauen‘ öffnen. Bei ‚Secure Sockets Layer (SSL)‘ auf ‚Immer vertrauen‘ wechseln.
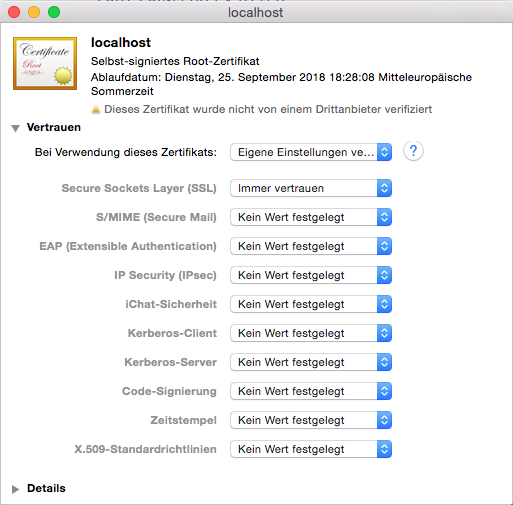
Die Änderung mit Passworteingabe übernehmen.
Zertifikat benutzen
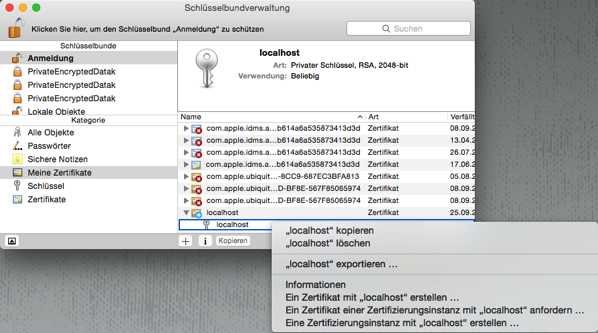
Den privaten Schüssel exportieren.
In der Schlüsselbundverwaltung mittels ctrl+click den privaten Schlüssel im Personal Information Exchange Format (.p12) exportieren.
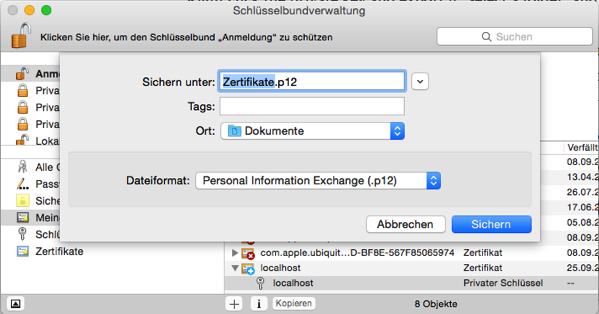
Kein Passwort angeben.
Den Export mit Passwort erlauben.
Das Zertifikat in PEM umwandeln. PEM ist ein Containerformat, das sowohl das Zertifikat als auch den privaten Schlüssel enthält.
Umwandlung mittels dem Program openssl.
Im Terminal in das Verzeichnis mit dem exportierten Schlüssel wechslen.
cd ~/Documents
openssl pkcs12 -in Zertifikate.p12 -out Certificates.pem -nodes
Da kein Passwort angegeben wurde, kann die Passwortaufforderung mit einem Enter bestätigt werden.
Enter Import Password:
MAC verified OK
Die Datei Certificates.pem wurde im gleichen Verzeichnis erstellt.
Diese Datei ist ein Textdatei und kann dementsprechend auch bearbeitet werden.
Die meisten Webserver verwenden zwei separate Dateien.
Eine mit dem privaten Schlüssel (key) und eine mit dem Zertifikat (cert).
Die zwei Dateien erstellen und den entsprechenden Teil aus Certificate.pem einfügen.
Zum Beispiel unterhalb vom User ein Verzeichnis ‚localhost-ssl‘ anlegen mit den Dateien key.pem und cert.pem.
In key.pem den Inhalt von Certificate.pem aus dem Abschnitt ‚—BEGIN PRIVATE KEY—‚ bis ‚—END PRIVATE KEY—‚ einfügen.
Beispiel Inhalt key.pem
-----BEGIN PRIVATE KEY-----
hier Inhalt aus Certificate.pem einfügen
-----END PRIVATE KEY-----
In cert.pem den Inhalt von Certificate.pem aus dem Abschnitt ‚—–BEGIN CERTIFICATE—–‚ bis ‚—–END CERTIFICATE—–‚ einfügen.
Beispiel Inhalt cert.pem
-----BEGIN CERTIFICATE-----
hier Inhalt aus Certificate.pem einfügen
-----END CERTIFICATE-----
Das war’s. Beide Dateien können jetzt beim Start des lokalen Webservers für https verwendet werden.
Sunspot Reindex And Devise
Your rails app is using Sunspot for fulltext search and Devise for authentication.
You add a field to the searchable block of a model.
How do you reindex solr as the app is protected by devise?
Start the rails console.
>ApplicationController.allow_forgery_protection = false
>app.post('/users/sign_in', {"user[email]" => "emailaddressgoeshere",'user[password]' => 'passwordgoeshere'})
>Modelname.reindex
>Sunspot.commit
Notice To Myself: Replace Whitespace With One Space Using sed on Mac OS X
In order to remove whitespace produced by lsof output you need to trim it with sed.
sed -E ’s/[[:space:]]+/ /g‘
Watch for the uppercase -E and [[:space:]]
Bootstrap Overrides And Mixins With Middleman
When it comes to prototyping for a web application I prefer a static website generator called Middleman.
Middleman is based on ruby and was recently updated to v4.
If your web application relies on Twitters Bootstrap framework integration is not straightforward.
Middleman is based on Sass where Bootstrap is based on Less (v4 will be based on Sass).
There is a Bootstrap Sass port available so this is the gem for Middleman
gem ‚bootstrap-sass‘, ‚~> 3.3.6‘
Bootstrap requires jquery so put that in the javascripts directory.
In the stylesheets directory edit the sites.css.scss file
// „bootstrap-sprockets“ must be imported before „bootstrap“ and „bootstrap/variables“
@import „bootstrap-sprockets“;
@import „bootstrap“;
Now you have a working bootstrap environment
But what about customizing? Bootstrap variables and mixins?
Create a stylesheet file bootstrap_and_overrides.scss in the stylesheets directory
Place the overrides in this file like
$body-bg: #f8f8f8;
$text-color: #808080;
Import the file in your sites.css.css
// „bootstrap-sprockets“ must be imported before „bootstrap“ and „bootstrap/variables“
@import „bootstrap-sprockets“;
// import bootstrap_and_overrides before bootstrap
@import „bootstrap_and_overrides“;
@import „bootstrap“;
Notice To Myself: Show All Processes Listening On TCP Ports (Mac OS X)
Sometimes you need to know what processes listen on tcp ports.
sudo lsof -i TCP | grep LISTEN
mysql_config not found on mac os x
While running a configuration for a python based program on Mac OS X I got
EnvironmentError: mysql_config not found
setting the mysql path fixed the problem
export PATH=$PATH:/usr/local/mysql/bin
Installing Sentry ends in gcc error
If you encounter this error while installing Sentry
error: Setup script exited with error: command ‚gcc‘ failed with exit status 1
You need to install the python-development package
Blogarbeiten
Nach 13 Jahren ist dieser Blog von domaingo zu 1&1 umgezogen.
Im Rahmen des Umzugs habe ich festgestellt, daß MovableType gar nicht mehr frei verfügbar ist und deswegen gleich noch auf WordPress migriert.